
Adding A Representative
A step-by-step visual guide to authorizing a business or group in your CRA My Account.
1
Log into your CRA Account
Navigate to the CRA login page. Use your CRA User ID and password a or partner to sign in to your CRA account.
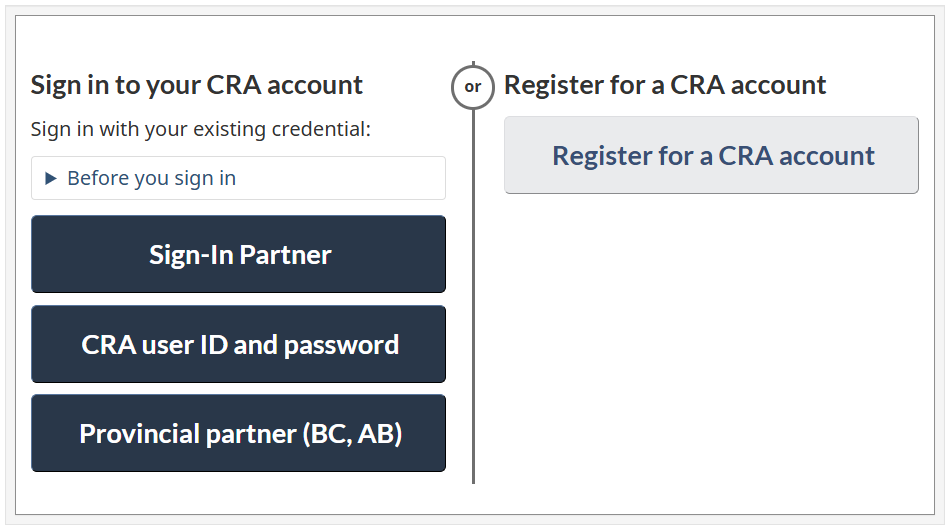
Click the image above for a screenshot of Step 1.
2
Navigate to "Profile"
Once logged in, look for the "Profile" link on the left side navigation bar.
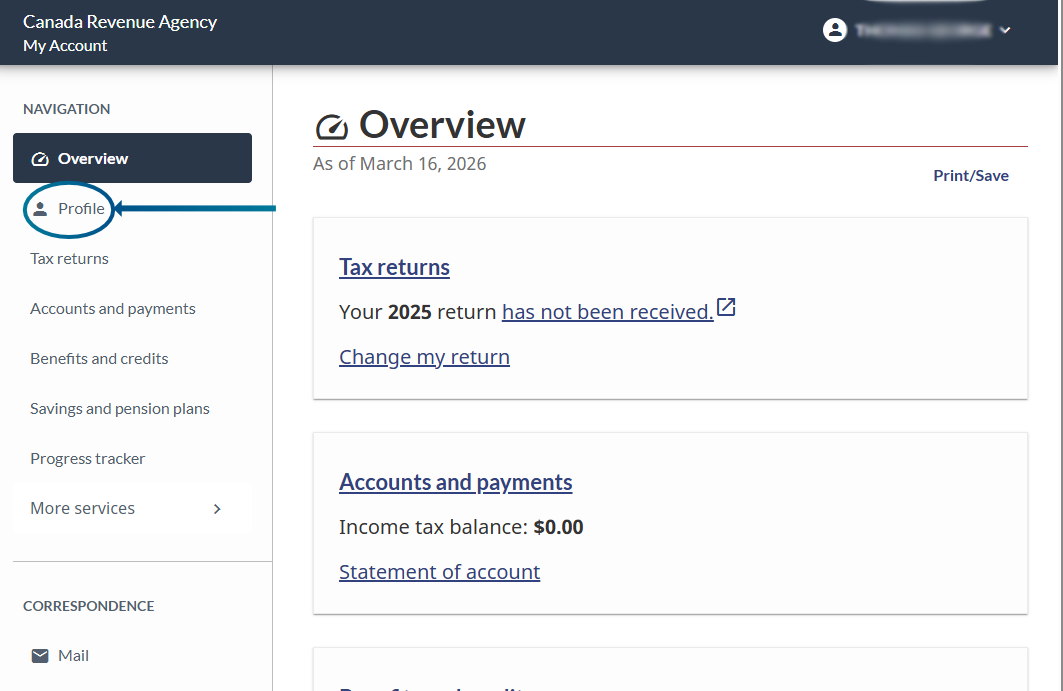
Click the image above for a screenshot of Step 2.
3
Add a representative
In the Authorized Representatives section, approximately half-way down the page on the right side, you will see a list of current authorizations (if any). Click the "Add" button.

Click the image above for a screenshot of Step 3.
4
Enter GroupID
After reading the "Before you begin" section, type in our GroupID GQC6N4 and click "Search".
Verify you see "Kite Accounting Solutions" as the result, and click "Next".

Click the image above for a screenshot of Step 4.
5
Select Authorization level & Expiry date
Select "Level 1" under Authorization Level, as well as "Yes" under Online access.
For expiry date:
- If you expect to have a continued engagement with us, check "Does not expire".
- If you wish to provide an expiry date, please select a date well into May. If you're self-employed, please select a date at the end of June.
Click "Next".

Click the image above for a screenshot of Step 5.
6
Review & Confirm
Review the authorization you're providing. Select the Confirmation, and click "Submit"
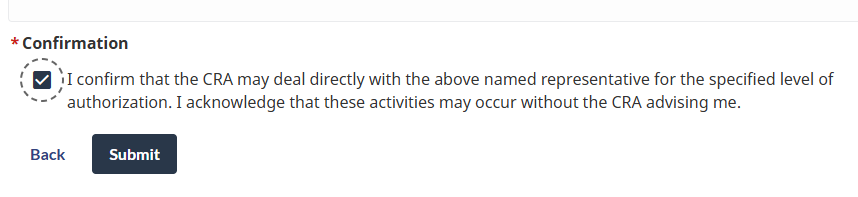
Click the image above for a screenshot of Step 6.
7
You have successfully added a representative!
Read the confirmation step to confirm you have added Kite Accounting Solutions as a representative.

Click the image above for a screenshot of Step 7.